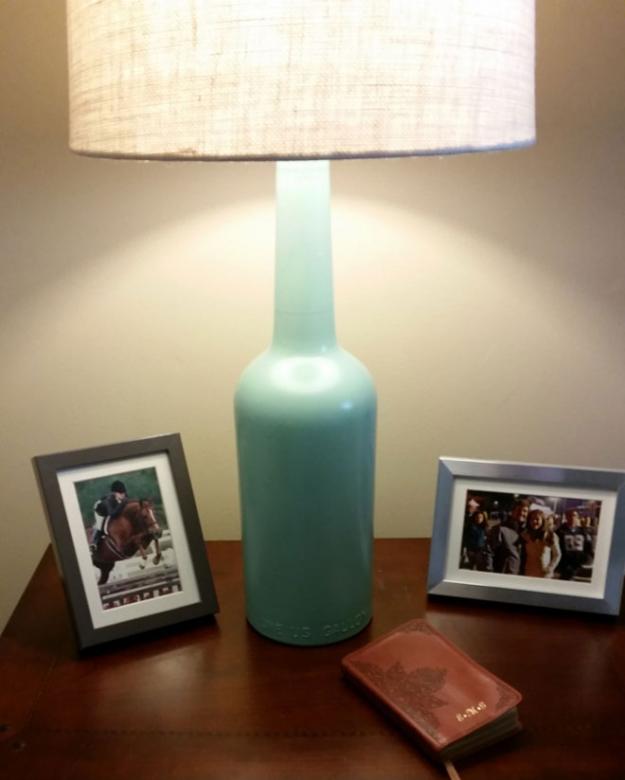
A new life for a pair of glass gallon jugs
So there I was, standing at the entrance to my room staring at the two “vintage” homemade brown glass lamps from the 1970s with their permanently crooked, oversized shades, on either bedside table. Or should I say, they were staring at me. I had been meaning to somehow tackle them, replace them, recycle them, paint them or do anything to them to improve their technically functioning but very outdated appearance.
Sure, they had a great shape, with neat raised letters on the bottom that spelled in all caps “ONE US GALLON” that were just waiting to be loved again. Sometimes finding a piece that has a great shape or ghost of an outline representing what it might become is all you need for inspiration!
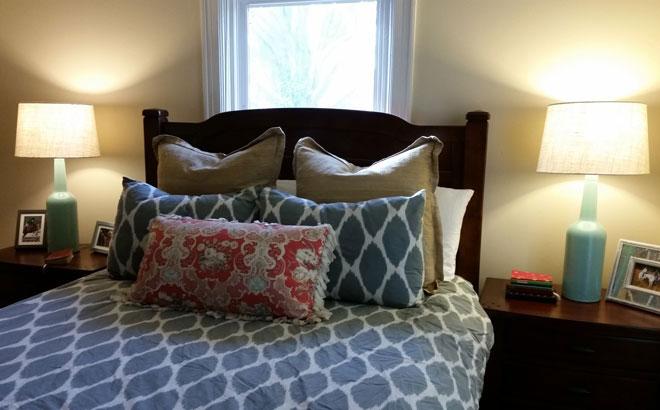
This would be the second recycle for these glass gallon jugs. In the 1970s, they were made into a pair of lamps and now, I’ve repainted them from top to bottom and added new shades, and they currently adorn my two night stands.
The process was actually rather easy, and I was able to complete everything in one afternoon. Well, I should say the hardest part was perhaps picking out the new paint color and lamp shades. That was done separately.
My process
I headed to the craft store and picked out a spray paint primer and, after much deliberation, a spray paint color. I went with white for the primer since my jug was so dark and still had labels that I wanted to cover up. The labels proved too tricky to take off, so I just decided to paint over them. The color paint I purchased was actually a primer plus paint which added a nice layer on top of the white primer. There were multiple finish choices and I stuck with matte finish, since I can always purchase a gloss finish spray if I want to add it later.
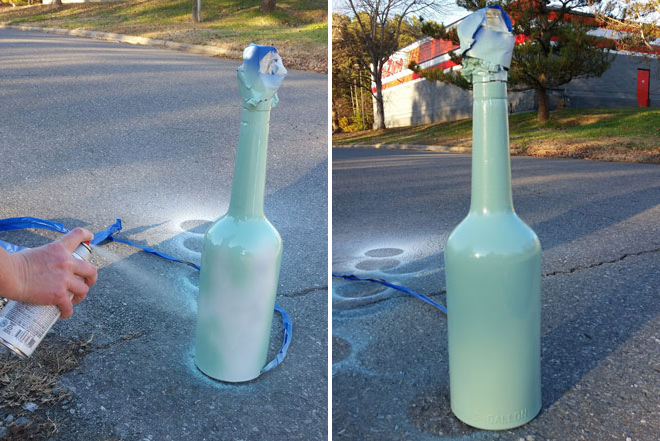
Next, I took off the old shade and lamp harp, wrapped the top socket in plastic and carefully put painter’s tape over it to create a clean line for the paint application. I also taped the cord with painter’s tape.
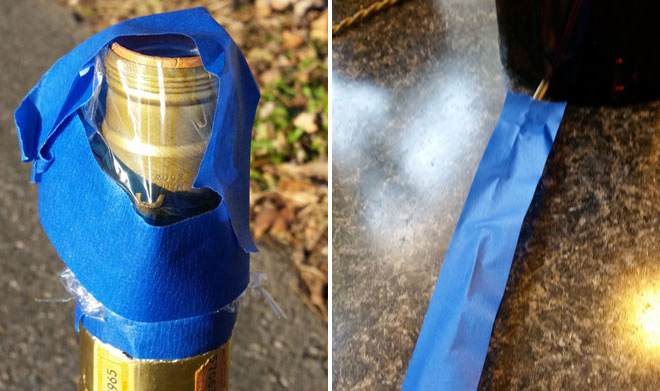
After wiping down the bottles with a wet paper towel to remove any extra dust or debris that might cause bumps below the paint, I took them outside. I was then ready to start the fun part.
I applied the primer first. The wind can quickly become your enemy so it’s best to paint on a day without wind gusts. I was so anxious to repaint these twin lamps that I said I’d forge ahead, but let’s just say I’ve made better choices. Also important to note: when spray painting, don’t hover over your object. Rather, give some reasonable space so not to create drips or streaks while you slowly go up and down your bottle in a systematic fashion. I did two to three coats per jug.
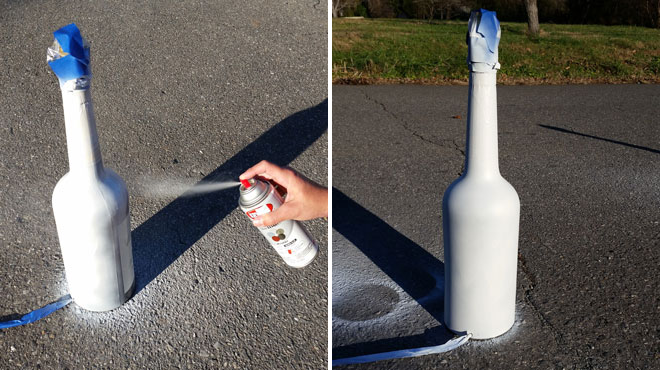
After the primer was dry (be patient!), I tackled the next coat of color. Again, be careful with your distance and make sure to shake the spray bottle really, really well. If the wind starts to blow, just walk away and come back. Side note: put down a tarp or newspaper before you start spraying. As you can see, not only did I paint my lamps, but I also added some nice color to the asphalt in front of my house.
I left them outside to dry (then I was grateful for the wind) and later in the evening brought them inside to strip off the tape and plastic wrap. I would suggest leaving them outside or on a porch for a day or so, since it really made my house smell like paint fumes. I was just so excited to bring them in!
I attached the new shades, put the lamps beside my bed and marveled at my work. What a difference some cans of spray paint and new lamp shades can do! I saved two lamps from the landfill and saved myself some cash from having to buy new lamps. Not to mention, it was pretty darn fun to do the actual spraying. It was like arts and crafts for adults!
