Upcycling an old dresser into a modern matte black gem
Your local Habitat ReStore is full of hidden gems and finds with upcycling potential — just ask DIY expert Theresa Clement. Don’t miss the transformation—read the full story to see the powerful before-and-after from one of her many success stories.
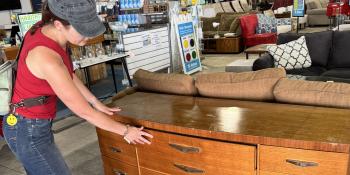
Habitat for Humanity ReStore in Philadelphia challenged me to makeover an old dresser from what was in stock at the ReStore into a modern matte black gem. As the inspiration for the after goal, I was given an image of the Toriano 6-drawer double dresser that retails for $2,899. Here’s what happened.
Picking up the dresser
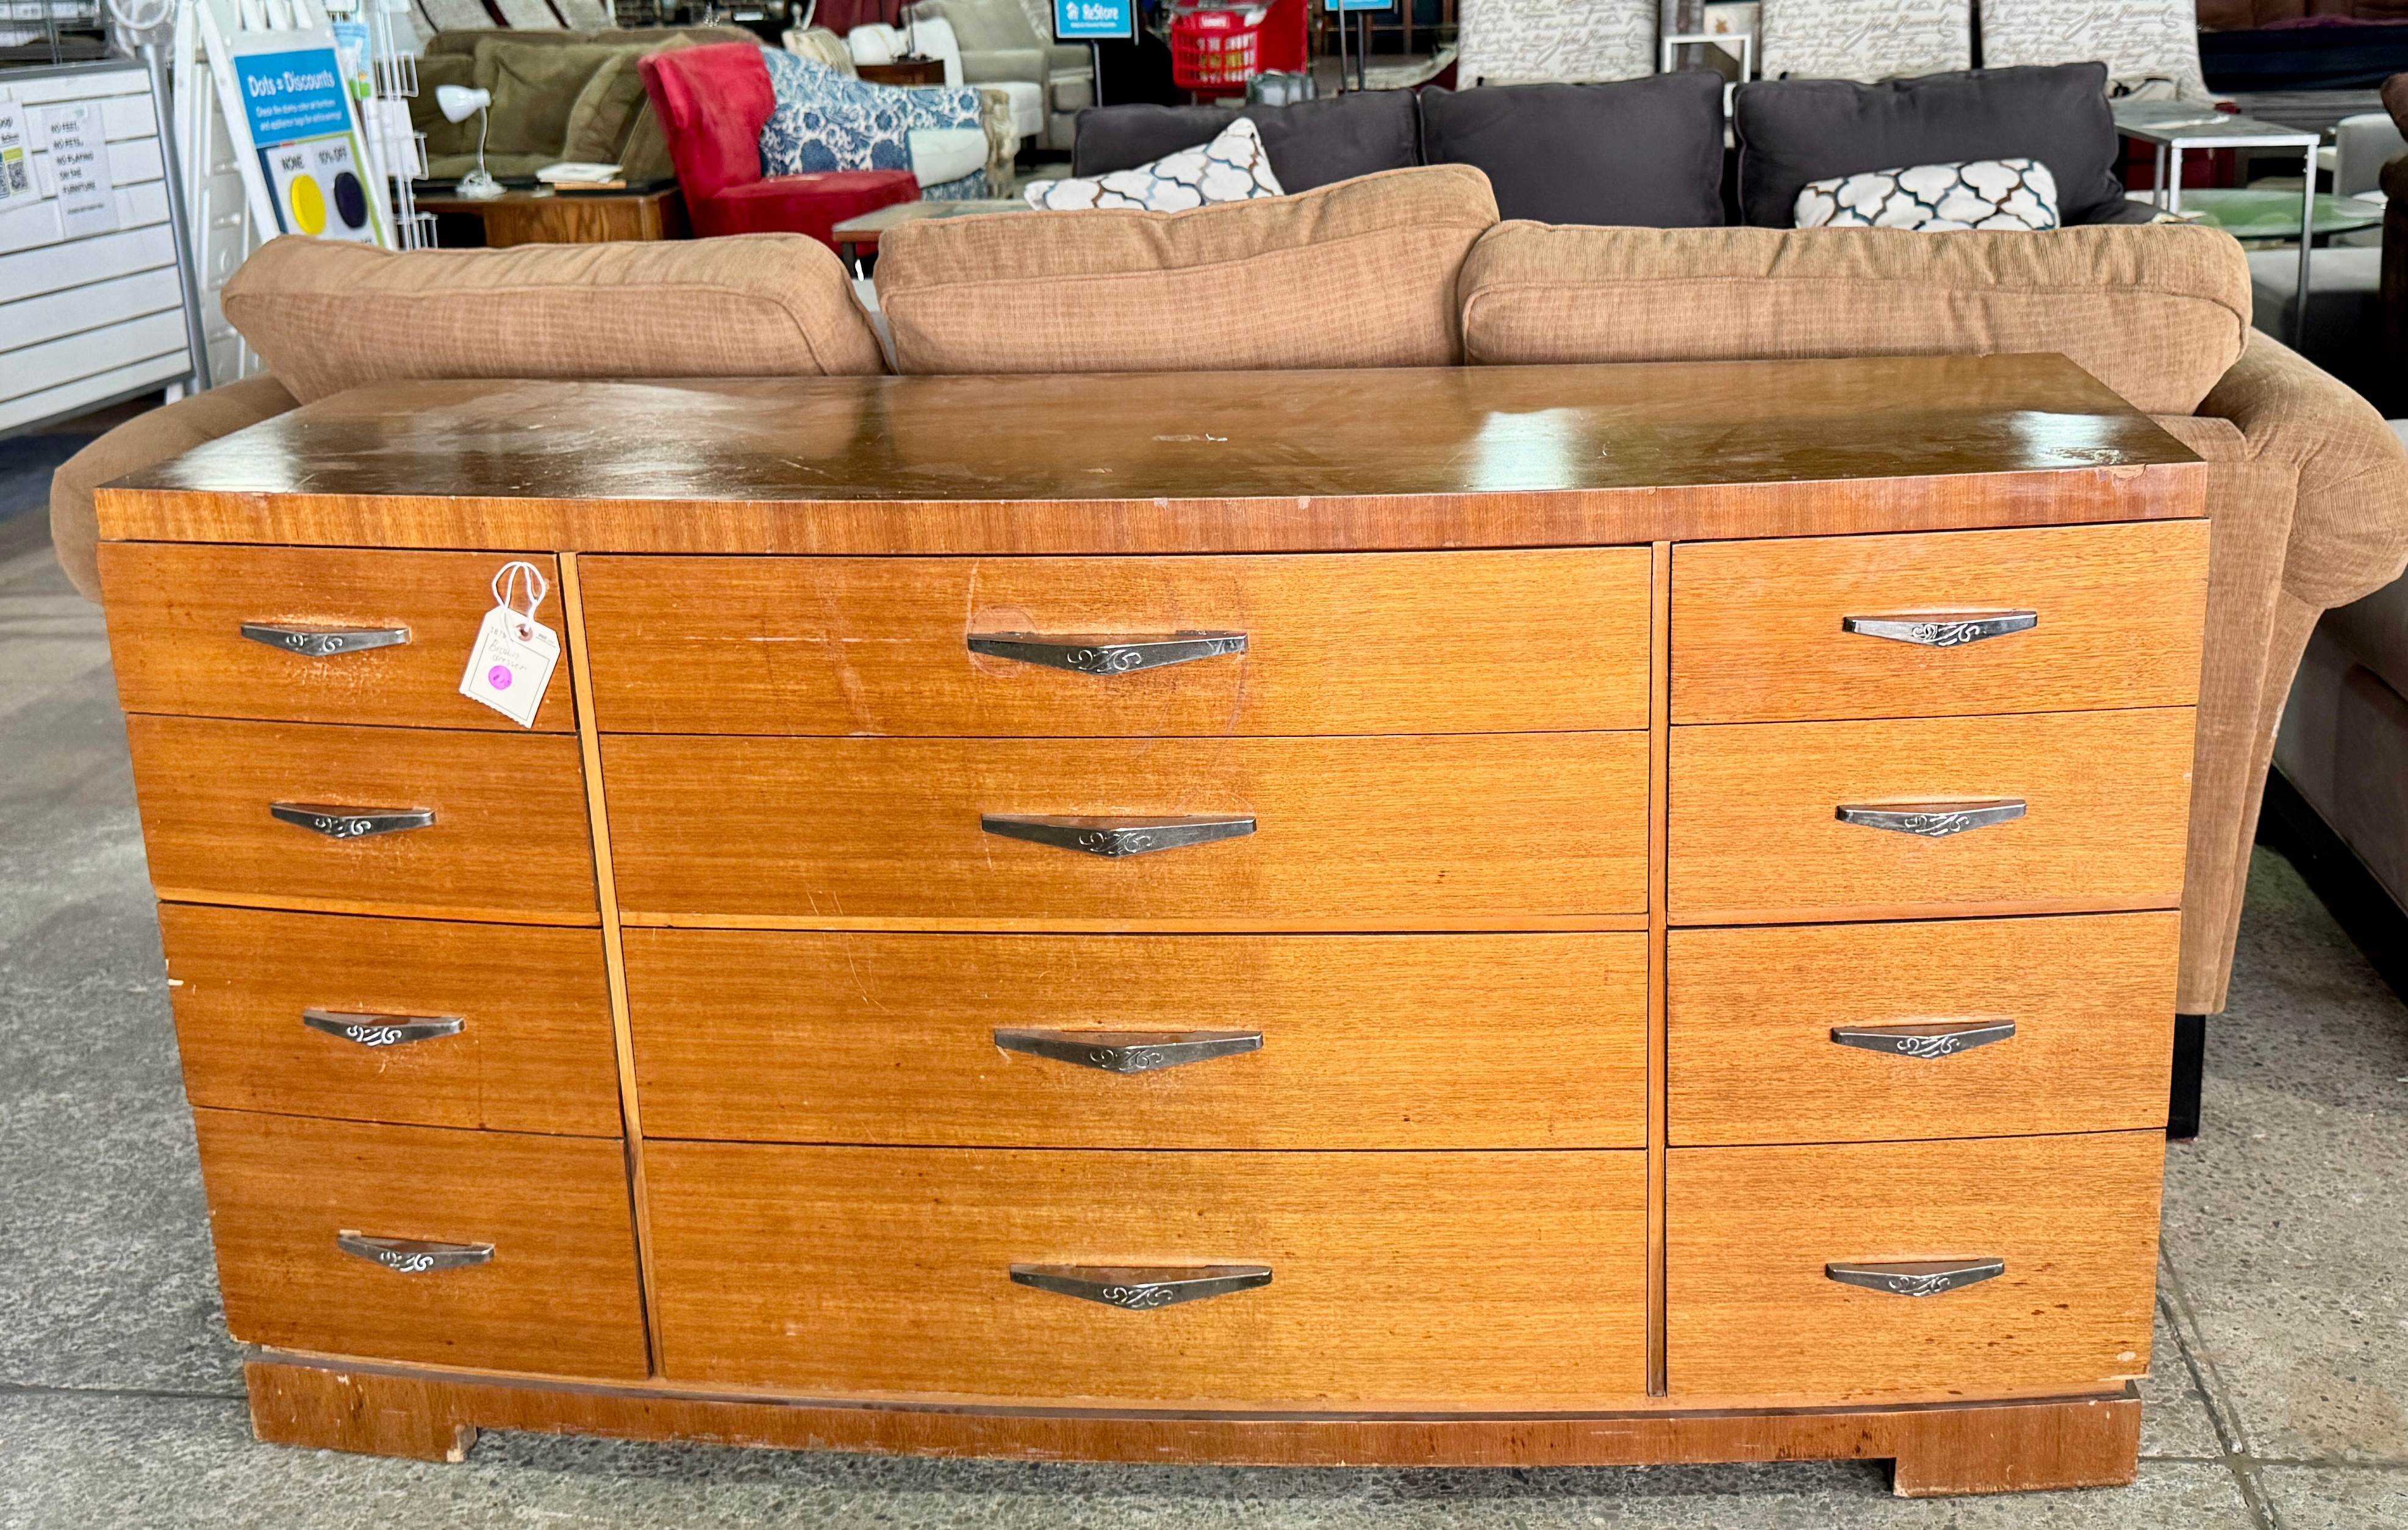
I picked up a 12-drawer dresser with wood veneer that resembled the same size and shape as the inspiration picture. In addition to the extra drawers, this dresser is solidly built and heavy.
Overall, it was in pretty good shape. However, some of the veneer was chipping and the top surface had seen better days. In addition to painting, I knew I was in for resurfacing, sanding and rolling out new veneer. The drawer handles were more Art Deco than modern, so those needed to be updated too.
The process
Before getting started on the dresser makeover, I needed to make a plan and gather supplies. In addition to meeting the challenge from Habitat ReStore, I also wanted to execute the project in a DIY-friendly way and keep the budget affordable.
Recommended supplies:
-
- Drop cloth
- Painter’s multitool
- Soft mallet
- Sandpaper (medium and fine grits)
- Sander
- Cloth
- Pencil
- Utility knife
- Metal straight edge
-
- Wood veneer
- Construction adhesive
- Primer
- Flat exterior paint
- Furniture wax
- Drawer liners
-
- Veneer roller
- Caulk gun frame
- Painter’s tape
- Foam roller
- Paintbrush
- Paint tray
- Furniture wax brushes
-
- Drawer pulls
- Scratch awl
- Hammer
- Drill
- Fasteners
Let’s get started
Step 1. Remove hardware and any peeling or damaged surfaces.
After setting up the dresser under a tent and on top of a drop cloth, I started removing what we no longer needed. Using an impact driver, I removed the drawer pulls. For the peeling surfaces, I carefully inserted a painter’s multitool under each area that was peeling and tapped the end with a soft mallet to peel it away. I also removed the interior drawer liners.
Step 2. Clean the dresser.
After the dresser no longer had the parts we weren’t using, it was time to clean it. I wiped it down with a soft cloth and sprayed surface cleaner to remove any dust, debris or residue. It’s important to clean furniture before installing new veneer or sanding, which are the next steps.
Ready to jump into your own DIY project?
Step 3. Fill in any holes or imperfections with wood putty.
Since I planned to change the drawer pulls with new pulls that wouldn’t match the holes in the drawer fronts, I filled each fastener hole with wood putty. I also used putty to fill in a few scratches and dents.
Step 4. Attach new wood veneer.
I measured the dresser’s top and then cut a piece of wood veneer a little larger than that size. This dresser has a curved front, so it would be complicated to replicate the shape without tracing it. I placed the rough-cut veneer sheet on the dresser, matching up two of the edges to the dresser, and then weighed it down so it wouldn’t move.
Next, I ran a pencil underneath the veneer to trace the shape. Using a utility knife and a straight edge, I cut the third straight side. Then, I carefully scored the curved side with the knife freehand.
I placed the cut veneer on the dresser, lining it up, then carefully peeled back the surface so it rolled out on top of the dresser. Using a peel-and-stick wood veneer is very similar to putting a new screen protector on your mobile phone. I then used a roller to make sure the veneer had complete contact and was smooth.
For the edging, I used construction adhesive to secure the wood veneer and painter’s tape kept it in place while it cured.
Step 5. Sand the surfaces to prep for paint.
The wood veneer was paint-ready, but the rest of the dresser had a glossy finish that needed to be roughed up in order for paint to adhere. I used a cordless multitool with a sander attachment. Starting with a rough grit, I sanded the wood putty first. Then, I switched to a medium-grit sandpaper and went over the rest of the original surfaces. I followed this with a fine-grit sandpaper.
Step 6. Prime the dresser.
After the dresser was repaired and had a smooth and consistent surface, it was time to prime. The primer I chose is a little thicker than others on the market, which makes it great for creating a smooth surface that’s paint-ready.
Step 7. Paint the base.
The inspiration image had a metal base in gold, which I wanted to replicate as best as I could without having to take apart the base and make a new metal stand. I decided to spray paint the base in a gold metallic finish. I used a scrap piece of cardboard to protect the rest of the dresser from possible overspray. Also, I chose to paint the base first, in case any overspray went beyond the cardboard.
Step 8. Paint the dresser.
It’s usually best to paint multiple thin coats on furniture. This makes the finish more durable. I used a paintbrush to cut in the base and paint some of the details and then rolled out the rest.
When painting a dresser or anything else with a top, I approach it the way I frost a cake. I paint the sides first and then the top. This way, if there is any rogue paint that leaks over the edge, the top will have the better finish.
Step 9. Install new drawer pulls.
After the paint was dry, I attached the new drawer pulls. To make the process easier and consistent, I created a template for each of the two sizes of drawer pulls that I used. First, I measured the drawer pull and laid out the measurements on paper, marking exactly where the fastener needed to be installed. Then, I marked the centerline and cut out the center of the template.
For each drawer front, I found the center and then positioned the template over top so that it lined up with the vertical and horizontal centerlines on the paper. Using painter’s tape, I temporarily attached the template. Then, I used a scratch awl and hammer to mark the fastener locations and removed the template so I could drive pilot holes through the drawer front. Lastly, I used combination thread screws with self-drilling tips to drive through the drawers and attach the new pulls.
Step 10. Seal with furniture wax.
After the paint cured for about a week, I applied clear furniture wax to lock in the paint and protect the finish. Using the same strategy as applying paint, I applied wax in the details, sides and top.
Step 11. Line the drawer interiors.
When the sealer was dry, I cut the peel-and-stick wallpaper that I had left over from another project to size and lined each drawer. I think the pop of pattern and color adds a bit of cheery-whimsy to a very modern and sleek dresser.
See the dresser’s amazing transformation


About Theresa
Theresa Clement is a handy designer who has been improving homes for more than 20 years. A certified color expert, she is known for solving design dilemmas with paint. She has spray-painted everything from wood furniture to gumballs to complete a look for a client. Theresa started her career at architecture firms and went on to write DIY books. She’s a contributor to Architect Magazine, JLC Magazine, and Remodeling Magazine. She’s also worked as a design producer on makeover shows. Now, she works with her carpenter husband on private homes and their home improvement brand, MyFixitUpLife.